The creation of a statue is multi-faceted and fascinating. While the process is not written in stone, so to speak, the following steps are tried and true ways of achieving the desired result.
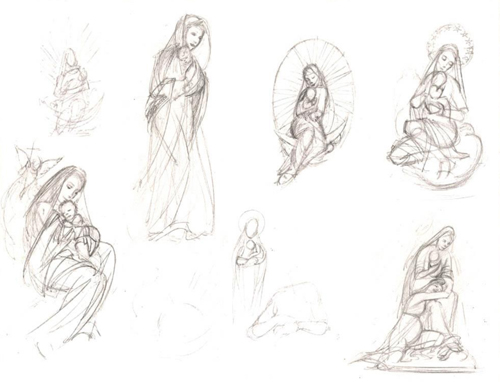
The first step is conceiving and crystallizing an initial concept. This is accomplished through a series of small, rough drawings called ‘thumbnail sketches’. These are drawn quickly from imagination to explore as many ideas as quickly as possible. Once a concept has been agreed upon, it is then rendered in more detail for presentation, often in the form of ‘turnaround’ drawings, which visualize the concept from several angles. The next step is to create a small, well detailed model – or maquette – upon which the larger casting will be based. This is where the initial drawings are expanded into three dimensions and any resulting compositional problems are worked out, enabling the maquette to be used as a working prototype of the finished sculpture. Using the maquette as a guide, the full-sized statue is then sculpted in clay. This is followed by the creation of a mold over the finished clay statue, which when finished can then be used to make a casting of the finished statue in whatever the desired material may be (Note: For bronze work there is an intermediary wax cast that is necessary).
Here is a quick look, in a more expanded form, at some of these steps in the creation of what has come to be known as the ‘Mary, Mother of the Life Within’ statue:
Everything begins with a good concept. To arrive at one requires good communication between the client and the artist so that the initial need can be properly defined and fulfilled.
All artistic endeavors start with drawing in one form or another. This is never more true than in the concept stage of a painting or a statue, where the ability to draw directly from imagination and quickly visualize a variety of ideas is essential. Do to the ease of such sketches and their limitless inherent possibilities, the concept stage is a great deal of fun and very often leads to thrilling, unexpected solutions: |
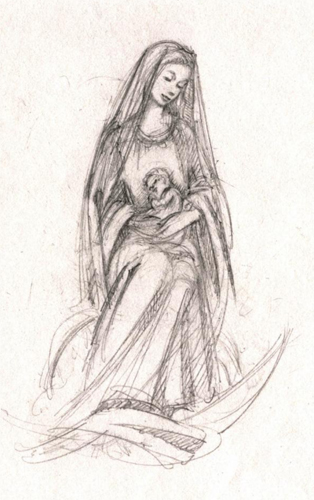
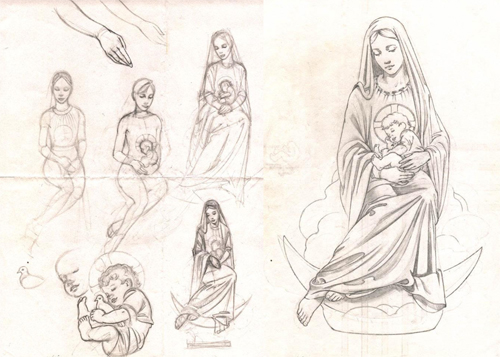
| Once a suitable concept has been arrived at, the next step is to refine details in order to get a more accurate sense of the composition: |
Once the final sketch has been approved, (Note: Turnaround drawings were not used on this project) the actual sculpting of a ‘maquette’ can begin. Just as the finished drawing is presaged by rough sketches, a final sculpture is predicated by a small version, or maquette. The reason for this is to work out all unforeseen problems in a stage where they can be easily and quickly solved. This saves both time and money during the sculpting of the finished piece.
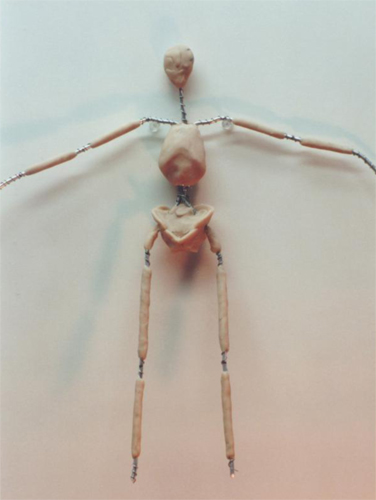
To begin, a quick drawing was made to scale upon which a wire skeleton, or armature, was measured out and constructed. |
The armature was then finessed into the correct pose and roughly fleshed out in clay before being carefully modeled and detailed one section at a time. Care was taken to sculpt particular areas first that would no longer be accessible at a later stage.
The ‘clay’ used for the entire maquette in this case is called Super Sculpy. Super Sculpy is a synthetic that can be hardened by baking in the oven, making the sculpture much easier to transport. A bronze colored variant was used here to aid in seeing details. Areas of great mass, such as the cloud base, were first filled in with tin foil and the expensive Sculpy saved for the outer shell.
The process was helped along by using a model to pose as closely to the sketch as possible. Photographs of important features, such as the head, hands and feet, were taken from several angles to provide as much anatomical reference as possible.
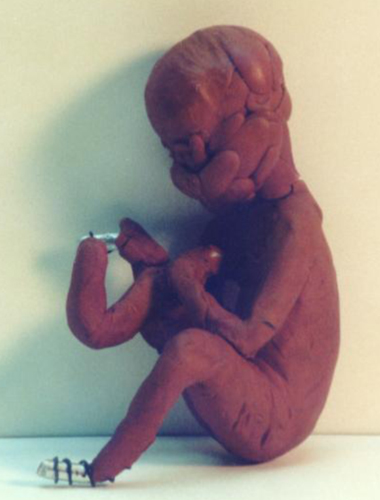
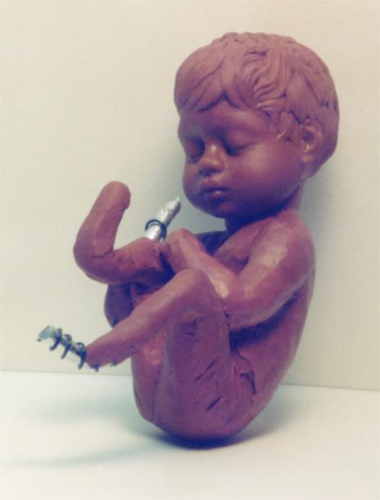
In order to gain access to all areas that needed detail, the infant needed to be sculpted, baked and hardened separately. The figure was then placed in its proper location after which the Blessed Mother’s arms were wrapped around the tiny body. Clay drapery was then added completing the composition as a single unit.
In order to sculpt details on the statue’s many small features, such as the child’s
tiny hands, feet and head, which is barely one inch high, very fine tools were used. Many are commercially available, but some were custom made to suit exact needs. Following are images of the sculpture in several stages of completion.
|
|
| When the maquette was completed, it was baked to harden it. Upon cooling it was hand sanded using very fine grit sandpaper to give it the best possible finish for presentation. The result is seen here: |
|